Here at KDAWS we use a magical bit of software called LiteSpeed Web Server Enterprise; This isn’t just good for our servers, as it allows them to deal with far more page requests than a standard Apache setup, but it is also amazing for anyone using PHP and anyone out there with WordPress websites. Why is this we hear you ask? Well, there is a little plugin called LiteSpeed Cache or LSCache for short.
To understand why LiteSpeed cache is an awesome plugin we first need to understand what caching is.
Take the cache and run
Whenever someone visits your site for the first time, a complicated process begins on the server.
- When your visitor loads a page, the WordPress software (code) sends a request to your site’s database, which then returns the requested data back to the WordPress software
- The WordPress software then combines all the collected data and generates your page
- That page is then sent to your visitor’s browser and your website is displayed
This happens every time someone visits your website and depending on what plugins you have installed load times can vary, as they all have their code to run and data to fetch.
This is why caching was invented. Caching can greatly improve your websites load times by remembering the results of some or all of those steps above. LSCache for WordPress works by getting rid of most, if not all of the steps above for most visits.
This is how it works
- Your visitor loads your home page
- The WordPress software requests all the info it needs from your database
- The WordPress software generates the HTML page
- The page is then remembered in the LiteSpeed Web Server cache for the visitor
- The page is sent to your visitor’s browser
For the next visitor to the same page:
- The next visitor loads the same page
- LiteSpeed Web Server looks in the cache to see if it has a copy of the page
- The cached page is sent straight to their browser if there is one
As you can see, this completely cuts out WordPress if there is a cached copy of the page, that means no code to run, no data to fetch from databases and as you’d expect it’s much faster.
This is particularly handy if you have a very busy site as it takes far less computing power to send a cached page than it does to generate one every time, so you can serve more pages to more visitors at any one time when caching is enabled.
This is a very simplistic explanation of how WordPress caching works as there a lot is more going on in the background and the LSCache plugin offers a lot more optimisations, but it gives you an idea.
Why do I need to worry about site speed?
There are two main reasons why you need to worry about how fast your site is:
- Google cares – Faster websites will appear higher up in the search results than slow ones, meaning more visitors to them
- Visitors care:
- If your website takes too long to load then they’ll hit the back button and move on to the next result, one of your competitors
- Statistics show that on slow websites users order less frequently, the conversion rate from visitor to customer drops
We all want more traffic from Google and want more of our visitors to become customers don’t we? None of us likes losing out to our competitors either. Read on to find out how you can setup caching and stop your WordPress website from being slow.
Installing the LSCache plugin
Today I am going to cover the basics of installing WordPress cache, but keep a lookout as we will be doing a deep dive in to the additional features and how they work in future blog posts.
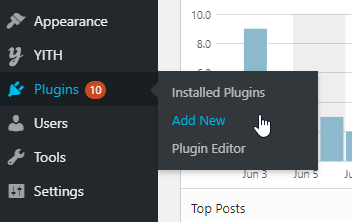
As with anything WordPress the first step is to login to your WordPress admin area:

Hover over the Plugins menu on the left hand side and then click “Add New”:
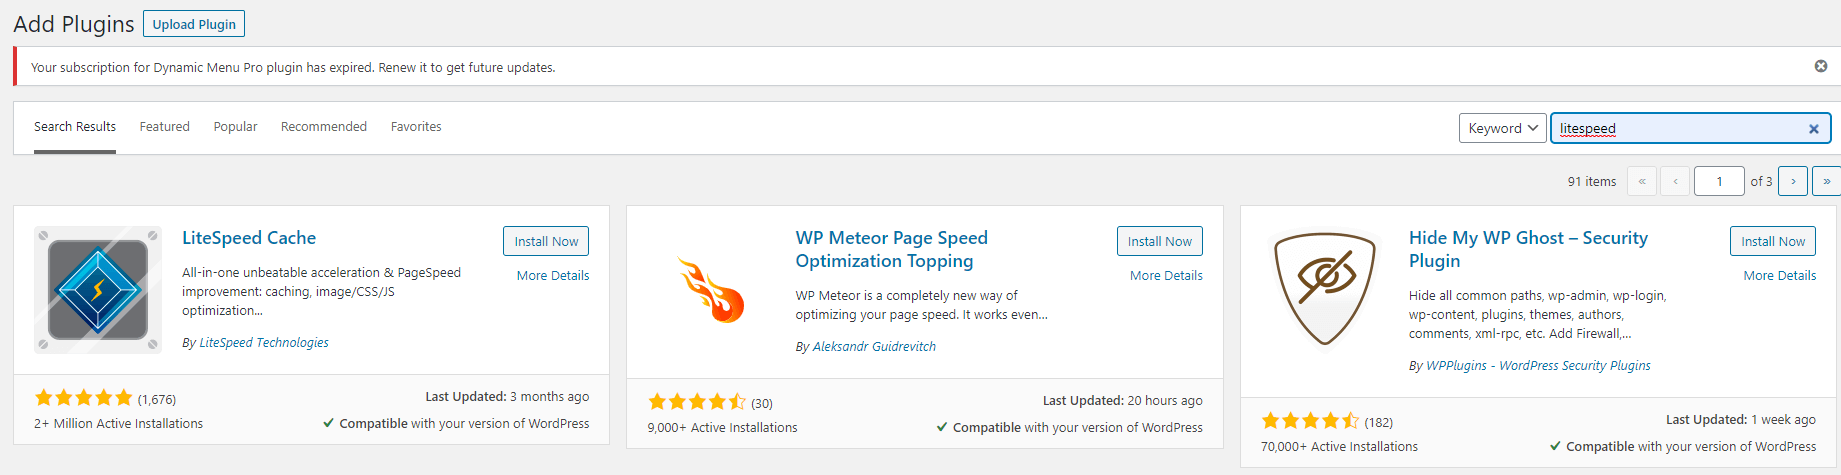
In the search box search for LiteSpeed and then click the “Install Now” button for LiteSpeed Cache:
Once the install has finished click the “Activate” button:
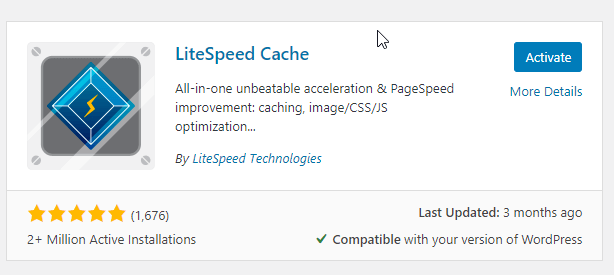
LiteSpeed Cache is now installed.
Configuring LSCache for WordPress
Now we’ve got the plugin installed and activated we need to configure it, this is going to be more of an overview of configuring rather than a deep-dive on each feature. We’ll be taking a closer look at some of the features in the future, until then we recommend making a copy of your website and having a play with the plugin on there.
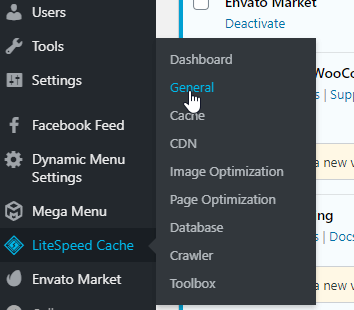
General settings
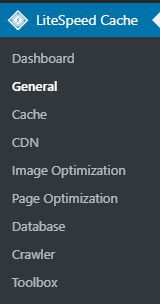
To get started, hover over LiteSpeed Cache on the left hand menu and then click “General”:
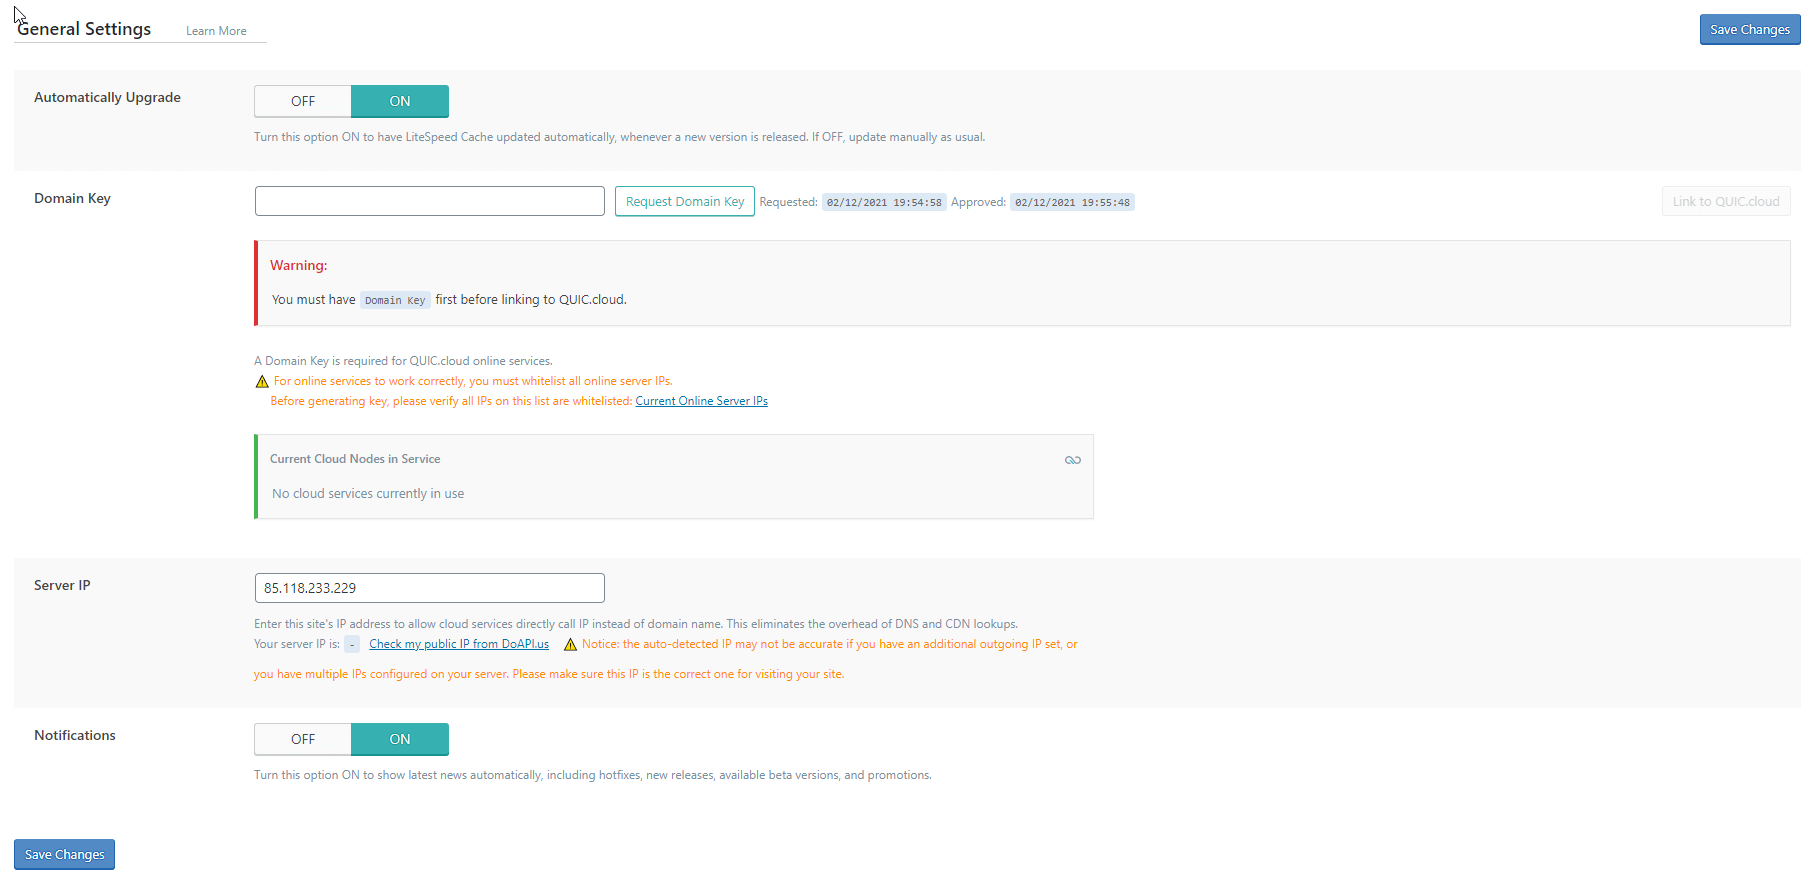
On the general setting screen we need to do the following:
- Choose if you want to enable automatic upgrades and receive new features and bug fixes as soon as they are available. For our personal sites we like to have this on, but it isn’t without some risks.
- Click the “Request Domain Key” button next, this will create a domain key with Quic.cloud, this allows us to setup free image optimisations and other goodies, so make sure it is clicked
- The server IP should be automatically filled in, if not ask your web host for this information.
- Leave notifications turned on as they can be handy when logging in to your WordPress to see what new features have been implemented in to new versions
- Click “Save Changes”, that’s the general settings done
Cache settings
Now lets click on the “Cache” menu on the left hand side of the screen:
We need to chance the following settings:
- Enable Cache – ON
- Cache Logged-in Users – ON
- Cache Commenters – ON
- Cache REST API – ON
- Cache Login Page – ON
- Cache favicon.ico – ON
- Cache PHP Resources – ON
- Cache Mobile – OFF
Then click the “Save Changes” button:

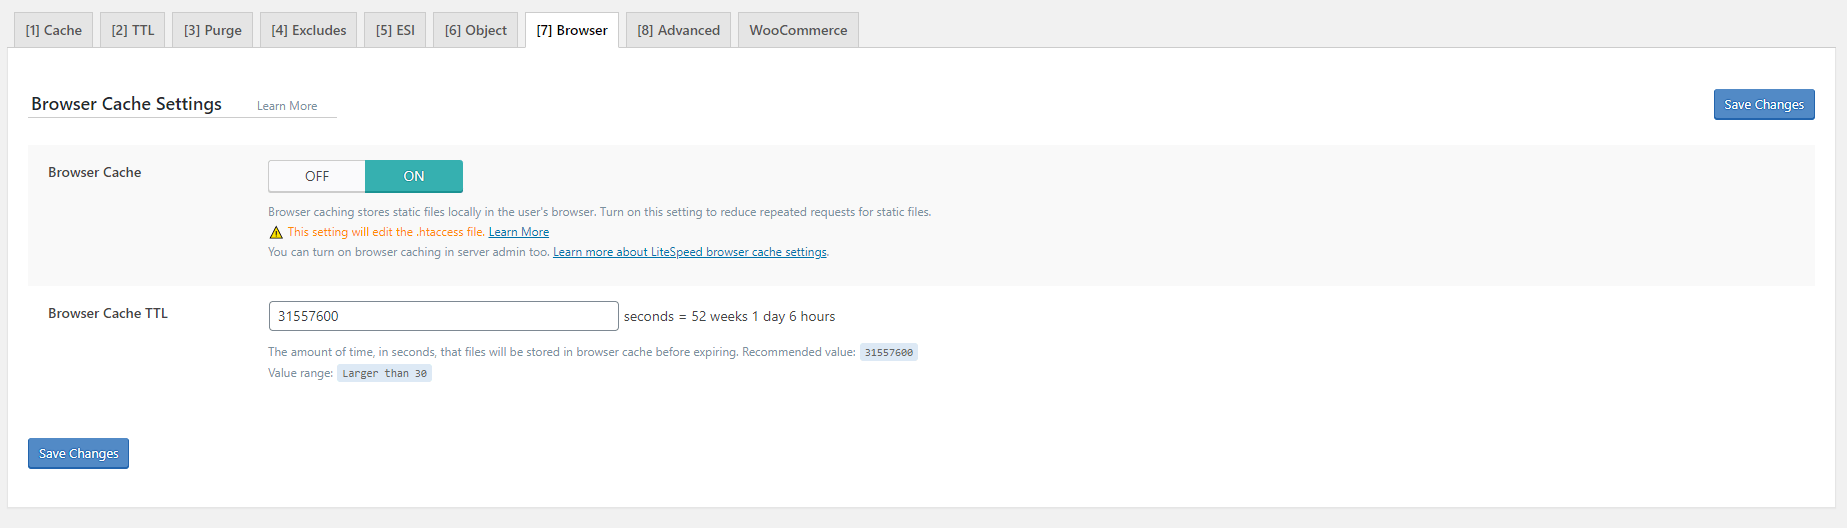
Now click the “Browser” tab along the top of the Cache page and make sure you turn on browser cache and click “Save Changes”:
If you are using WooCommerce, click on the “WooCommerce” tab along the top of the Cache page and make sure you turn on:
- Use Front Page TTL for the Shop Page
- Privately Cache Cart
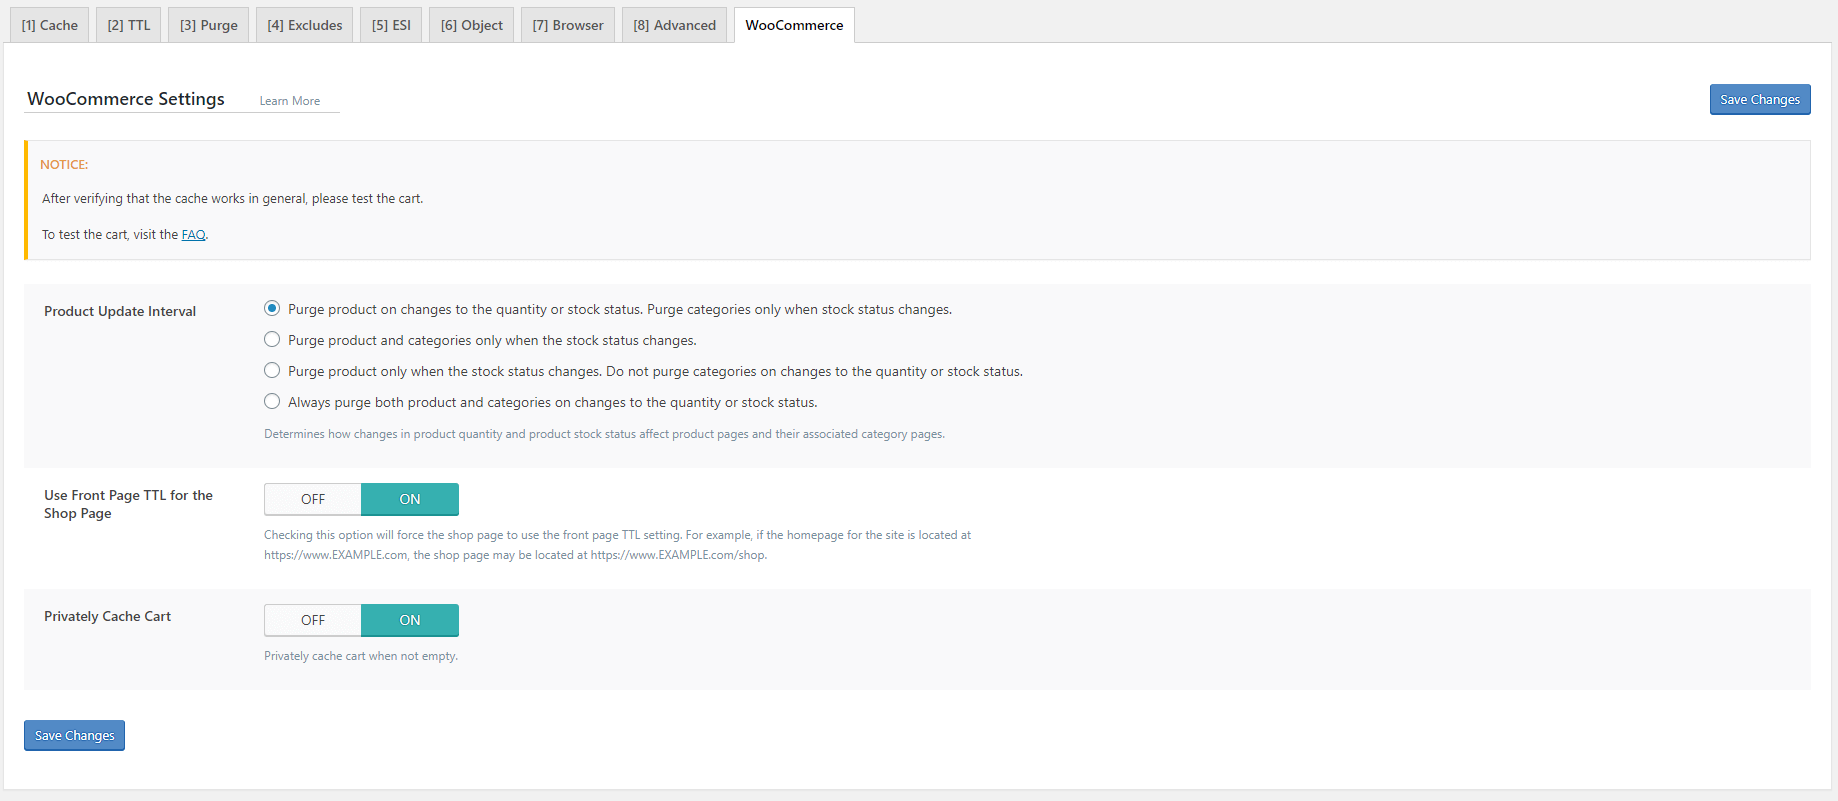
Don’t forget to click “Save Changes” once you’re done.
Image optimisation
Click on the “Image Optimizations” menu item in the left hand menu:
Make sure the following are set as follows as this will make sure all of your images are optimised for free by the LiteSpeed Quic.cloud:
- Auto Request Cron – ON
- Auto Pull Cron – ON
- Optimize Original Images – ON
- Remove Original Backups – OFF
- Optimize Losslessly – ON
- Preserve EXIF/XMP data – OFF
- Create WebP Versions – ON
- Image WebP Replacement – OFF
- WebP For Extra srcset – ON
- WordPress Image Quality Control – 82 (if you’re an photographer etc. then you may want to set this a little higher, at the cost of larger file sizes and load times)
You have now set up automatic image optimisation.
Page optimisation – CSS Settings
From the left hand LiteSpeed menu, select “Page Optimization”:
We need to make sure we set the following options:
- CSS Minify – ON
- CSS Combine – ON
- CSS Combine External and Inline – ON
- CSS HTTP/2 Push – ON
- Load CSS Asynchronously – ON
- Generate Critical CSS – ON
- Generate Critical CSS In Background – ON

As a quick tip would turn these on one by one and “Save Changes” and then test your site loading, we say this because sometimes some of these behave differently depending on what theme you’re using or other plugins. If for some reason your theme does not like one of the options, drop us a quick message on our website and we maybe able to help you with it.
Remember to click “Save Changes” once you have done this.
Page optimisation – JS Settings
Click the “JS Settings” tab at the top of the page.
We need to make sure we set the following options:
- JS Minify – ON
- JS Combine – ON
- JS Combine External and Inline – ON
- JS HTTP/2 Push – ON
- Load JS Deferred – ON
- Load Inline JS – ON
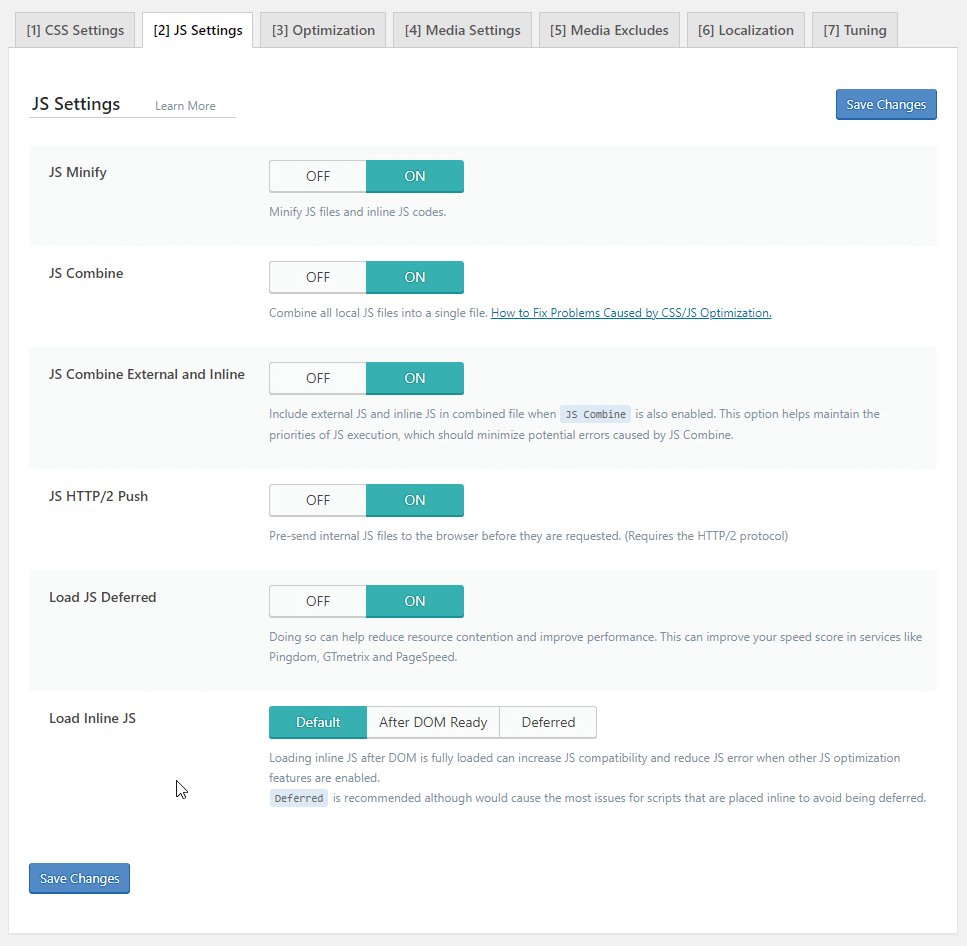
Once again, we would turn these on one by one and “Save Changes” and then test your site loading, we say this because sometimes some themes and plugins don’t always work as you’d expect them to.
If for some reason your theme does not like one of the options, drop us a quick message via our website and we maybe able to help you with it.
Remember to click “Save Changes” once you have done this.
Page optimisation – General
Click on the “Optimization” tab along the top of the page and set the following:
- HTML Minify – ON
- DNS Prefetch Control – ON
- Remove Query Strings – OFF
- Load Google Fonts Asynchronously – ON
- Remove Google Fonts – OFF
- Remove WordPress Emoji – OFF (If you’re not using comments you can probably turn this off)
- Remove Noscript Tag – OFF
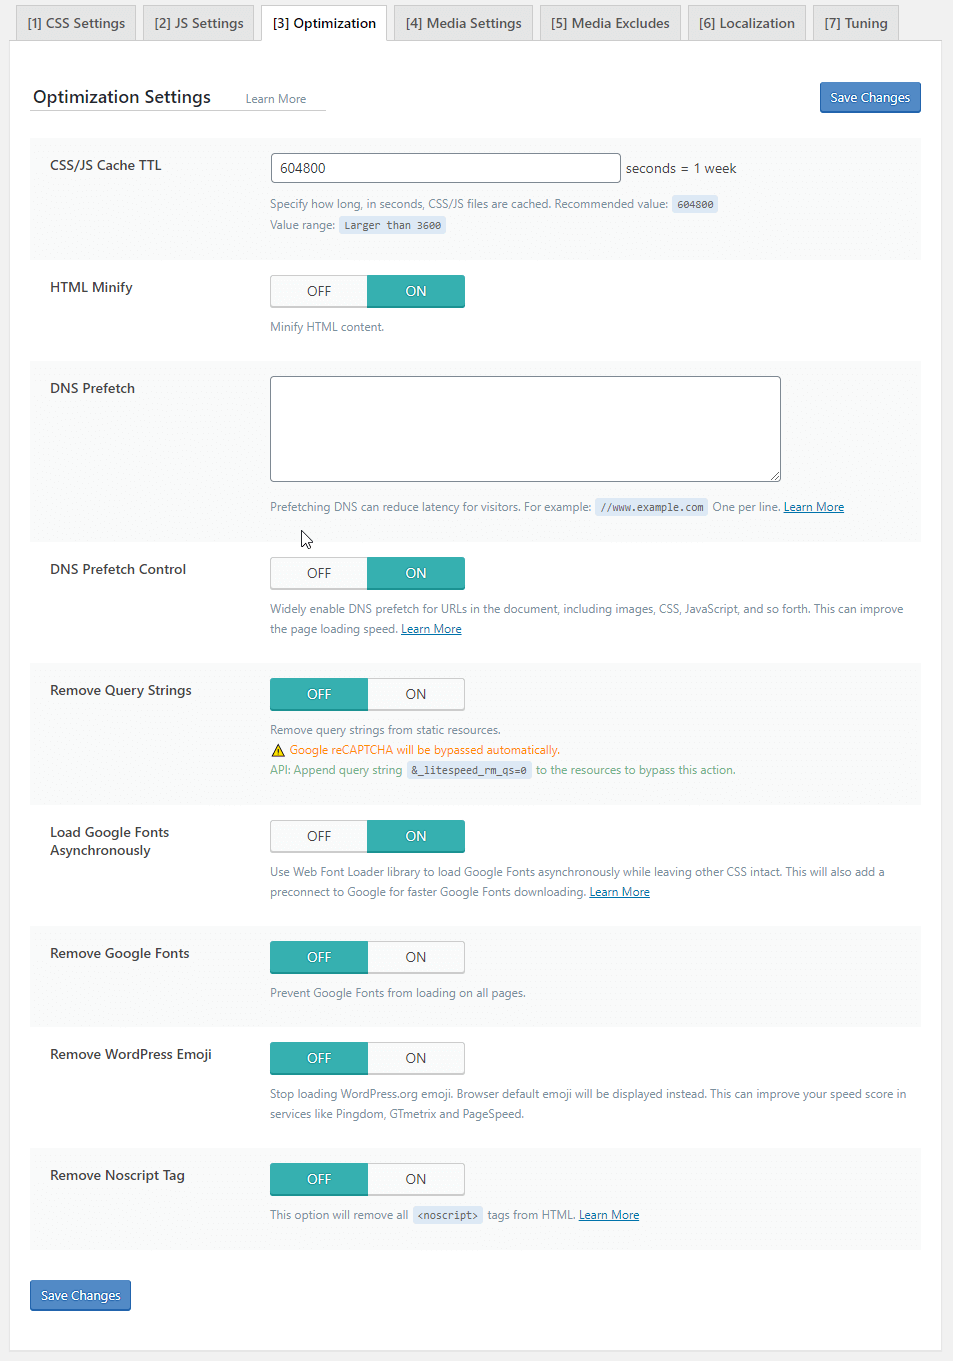
Remember to click “Save Changes” once you have done this.
Page optimisation – Media settings
Click the “Media Settings” tab along the top of the page.
Make the following changes, again it may be worth turning these on one by one, saving and testing as some plugins may interfere with these options/
- Lazy Load Images – ON
- Responsive Placeholder – ON
- LQIP Cloud Generator – ON
- Generate LQIP In Background – ON
- Lazy Load Iframes – ON
- Inline Lazy Load Images Library – ON
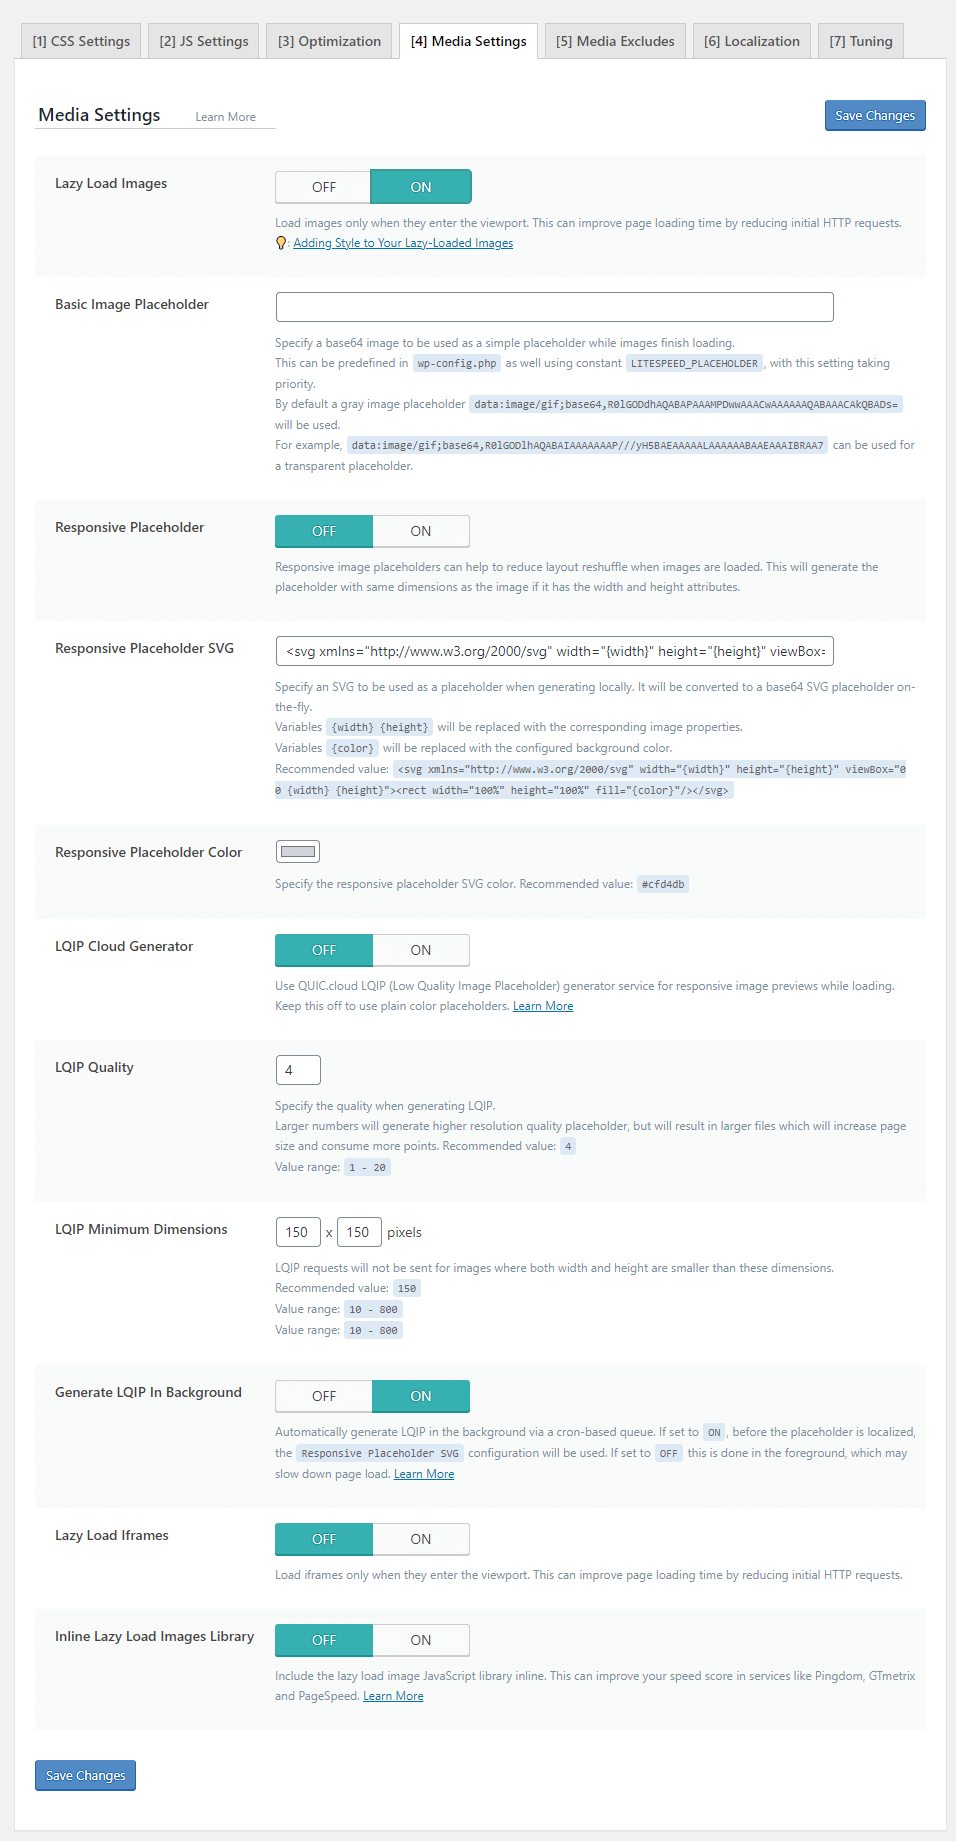
Remember to click “Save Changes” once you have done this.
Congratulations
You’ve just made your users and Google happier by speeding up your website.
This is our default setup for the LiteSpeed Cache WordPress plugin, sadly there is not a one size fits all setup though so some experimentation may be required.
Not all plugins and themes are the same, many will try and do their own optimisations and there may be a clash between them. As we mentioned at the start, we recommend testing this in a development environment; Fortunately if you’re on one of our virtual hosting packages it’s just a couple of clicks to create one.
If you do find you are having issues getting caching working correctly let us know as we will be more than happy to look at it for you.


